
Camera Setting
This chapter explains how to connect the EXCAP vision camera to your PC, configure it in Excap Studio, adjust its angle, and use the automatic calibration function in IMU + Vision mode.
WiFi Connection
Follow the steps shown in the image below to connect your camera.
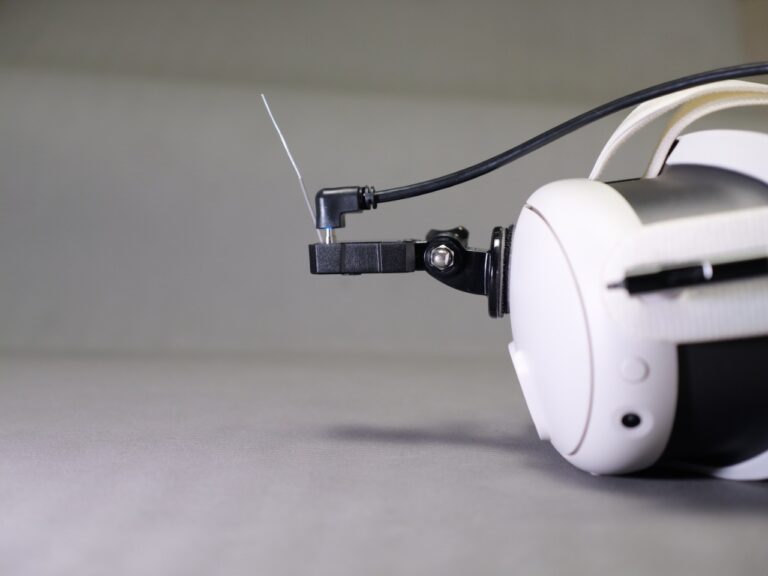
The first time you use the camera, connect it to your PC with a USB cable. Then open Excap Studio, go to the settings page, and open the camera settings.
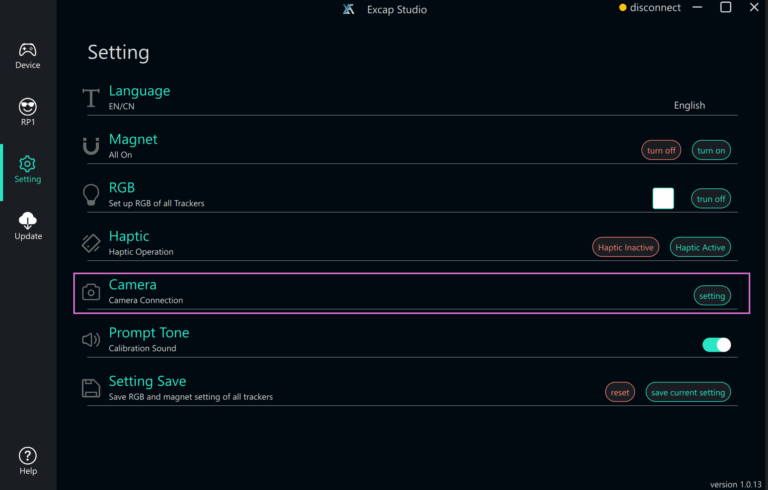
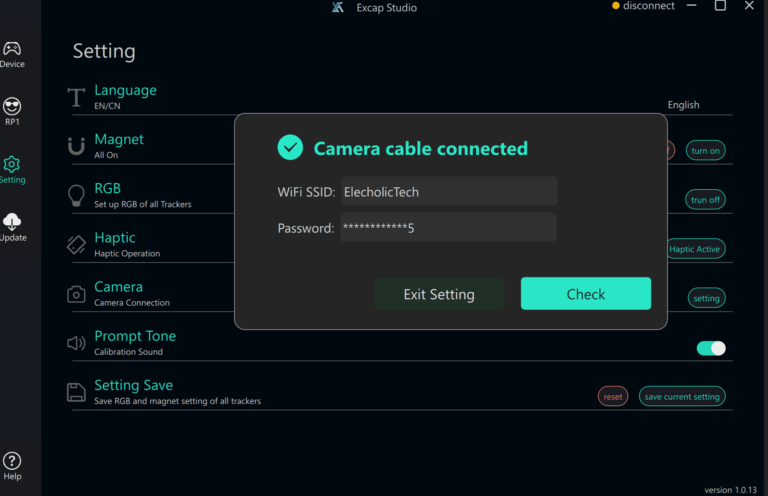
⚠️ Warning: The camera only supports 2.4 GHz WiFi. Make sure your router has AP isolation disabled, otherwise the camera and PC cannot communicate.
When the camera connects successfully, only the trackers on your lower legs and waist will light up; the other tracker LEDs will turn off. The camera will also be highlighted in the Excap Studio interface.
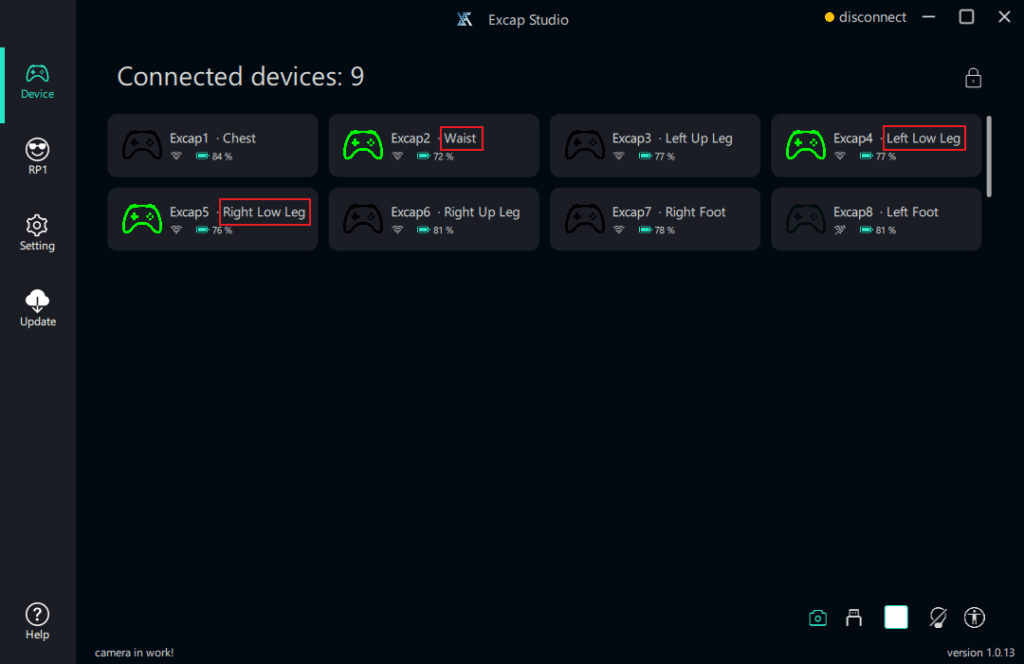
Adjust the camera angle. When only the Waist tracker light appears in the camera’s field of view, a popup will prompt you to confirm the angle. This means the camera is installed correctly.
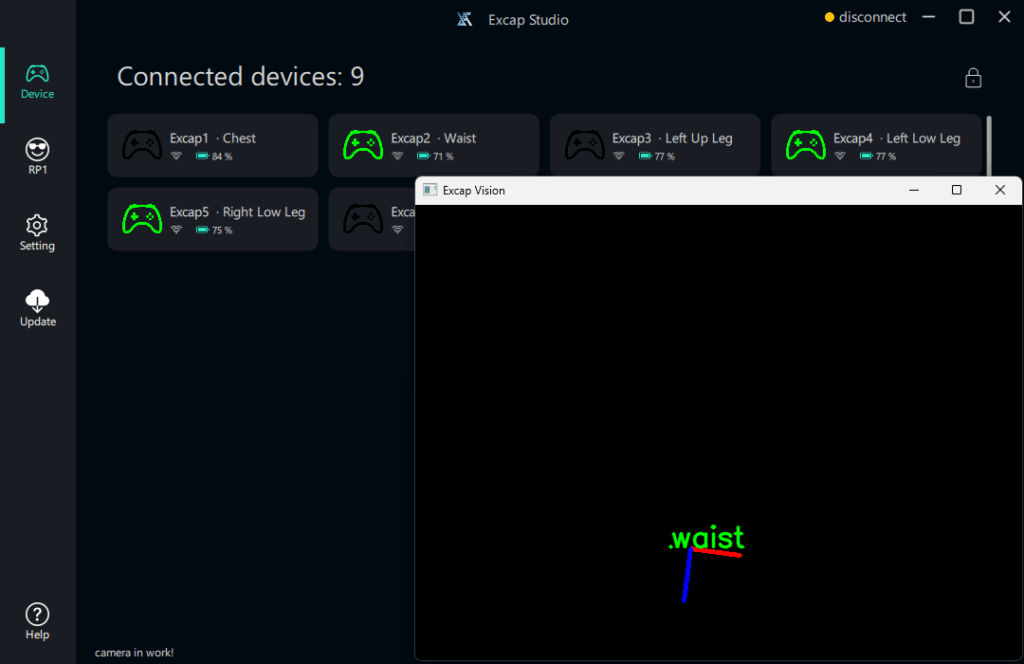
💡 Tip: The camera uses the tracker LEDs as visual markers. Lowering the room brightness slightly can help the camera detect the LEDs more reliably.
Auto-Calibration
The automatic camera calibration function has two prerequisites:
- You have already performed the A-Pose calibration.
- Excap Studio is connected to SteamVR or Standalone mode.
You can start automatic calibration in two ways:
- Trigger 1: Lean back slightly while standing so that the three illuminated trackers enter the camera’s field of view.
- Trigger 2: Take one step forward with either leg while standing straight.
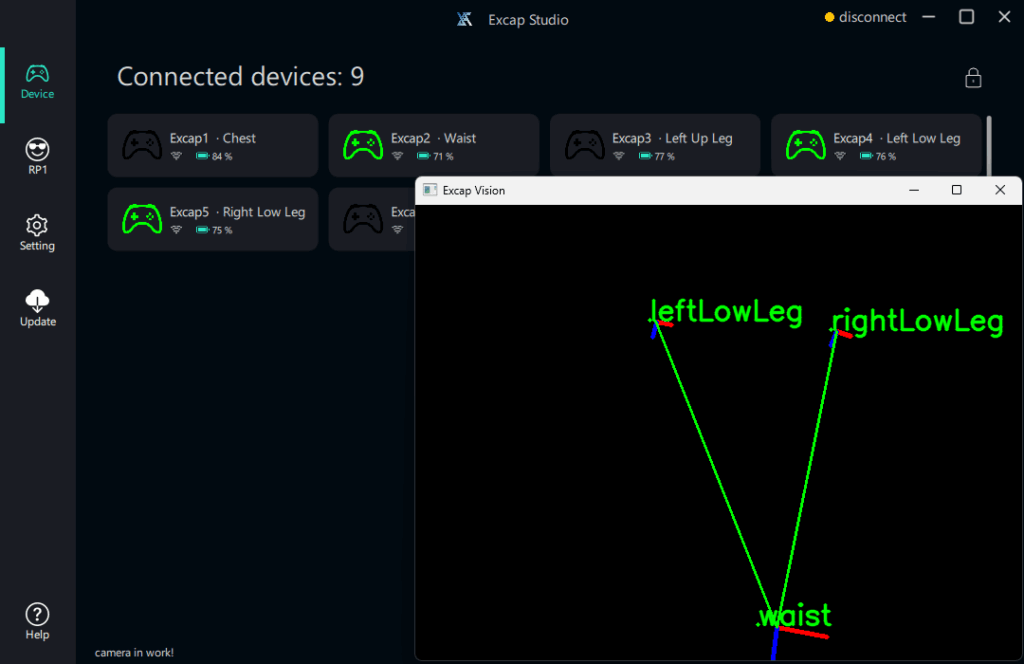
✅ Good to know: Auto-calibration usually takes only a few seconds. Stand still during the process so the camera can capture a clear reference frame.
⬅️ Previous: Tracker Setting · Next: Haptic Setting ➡️