# Quick Start
Welcome to EXCAP! This book walks you through everything you need to get your EXCAP tracker system up and running for the first time, from unboxing to full-body calibration in VRChat.
# Welcome
This is the official knowledge base for your **EXCAP full-body tracking system** — everything you need to go from opening the box to dancing in VRChat with full-body tracking. 🕺
## 🚀 New Here? Start With Quick Start
The fastest way to get going is the **[Quick Start](/books/quick-start)** book. Four short pages, about 15 minutes total:
| Step | Page | What you'll do |
|:---|:---|:---|
| 1 | [Unboxing](/books/quick-start/page/unboxing) | Meet your trackers, wear them, label them |
| 2 | [Download and Install](/books/quick-start/page/download-and-install) | Install Excap Studio and power on |
| 3 | [Enter Game and Calibration](/books/quick-start/page/enter-game-and-calibration) | Connect to VR and calibrate your body |
| 4 | [Congratulations and What's Next](/books/quick-start/page/congratulations-and-whats-next) | Final tips and where to go next |
### ✅ Before You Begin — What You Need
- A **Windows PC** with a free USB port (for the Excap Link dongle)
- Your **VR headset** (PCVR headset, or a standalone headset like Quest / Pico)
- **VRChat** (or another supported game) installed
- Your EXCAP kit and about **15 minutes** ⏱️
## 📚 The Four Books
| Book | What's inside |
|:---|:---|
| **1. [Quick Start](/books/quick-start)** | Unboxing → install → calibrate → play. Start here! |
| **2. [Connect EXCAP to Game](/books/connect-excap-to-game)** | Detailed guides for SteamVR, SlimeVR, and standalone headsets |
| **3. [EXCAP Settings](/books/excap-settings)** | Tracking modes, RGB, camera, haptics, and advanced options |
| **4. [Troubleshooting & FAQ](/books/troubleshooting-faq)** | Answers to common questions and the product roadmap |
## 🆘 Need Help?
- ❓ Something not working? Check the **[Q&A](/books/troubleshooting-faq/page/qa)** first.
- 💬 Still stuck? Ask the community on **[Discord](https://discord.com/invite/phmuVcyp7C)** — the Excap team hangs out there.
- ⬇️ Get the latest software from the **[Downloads page](https://www.elecholic.tech/resource/downloads/)**.
- 🌐 Visit the **[official website](https://www.elecholic.tech)** or the **[online store](https://shop.elecholic.tech/)**.
---
> © 2026 Elecholic Technology. All rights reserved.
# Unboxing
Welcome to EXCAP! 🎉 Let's get your new trackers out of the box and ready for action. This page covers everything in the kit, how to attach the trackers to your body, and a few simple tips to make your first setup smooth and stress-free.
## What's in the Box
Open the package and check that you have received all the items listed below.
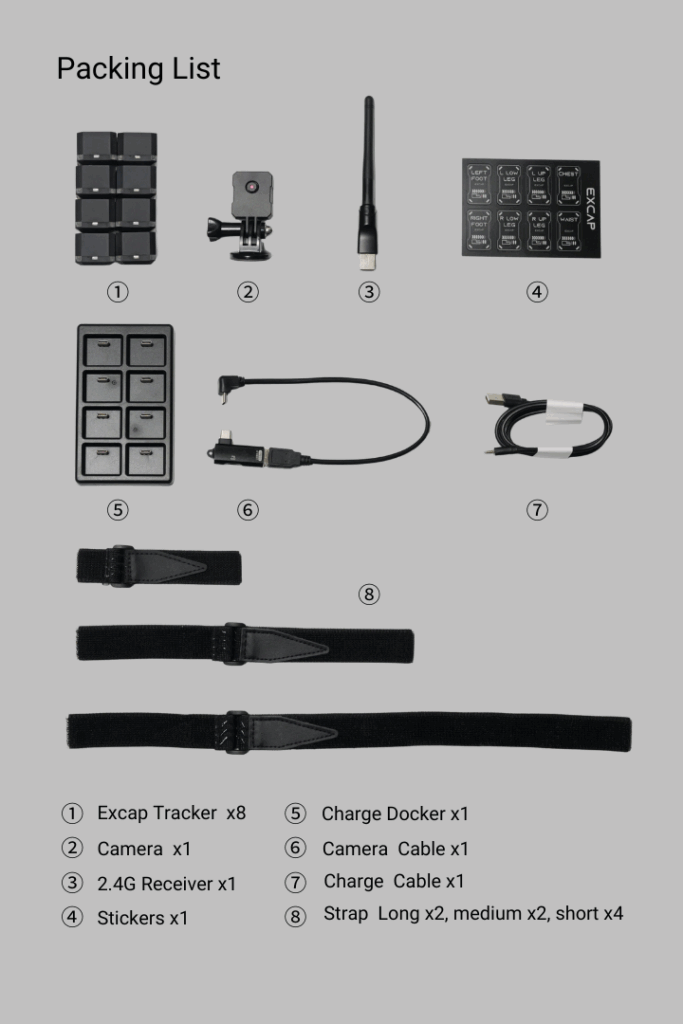
> 📝 **Note:** Keep the box and inserts in case you need to store or transport the trackers later. The straps and stickers are small and easy to misplace.
## How to Wear Your Trackers
Thread the strap through each tracker and fasten it at the position shown below.
- The tracker’s button side must face upward.
- The tracker should be on the front of your body.
- Keep the tracker from sliding as much as possible.
- Both 6-point and 8-point tracking are supported. Foot trackers are optional if you do not need ankle movement.
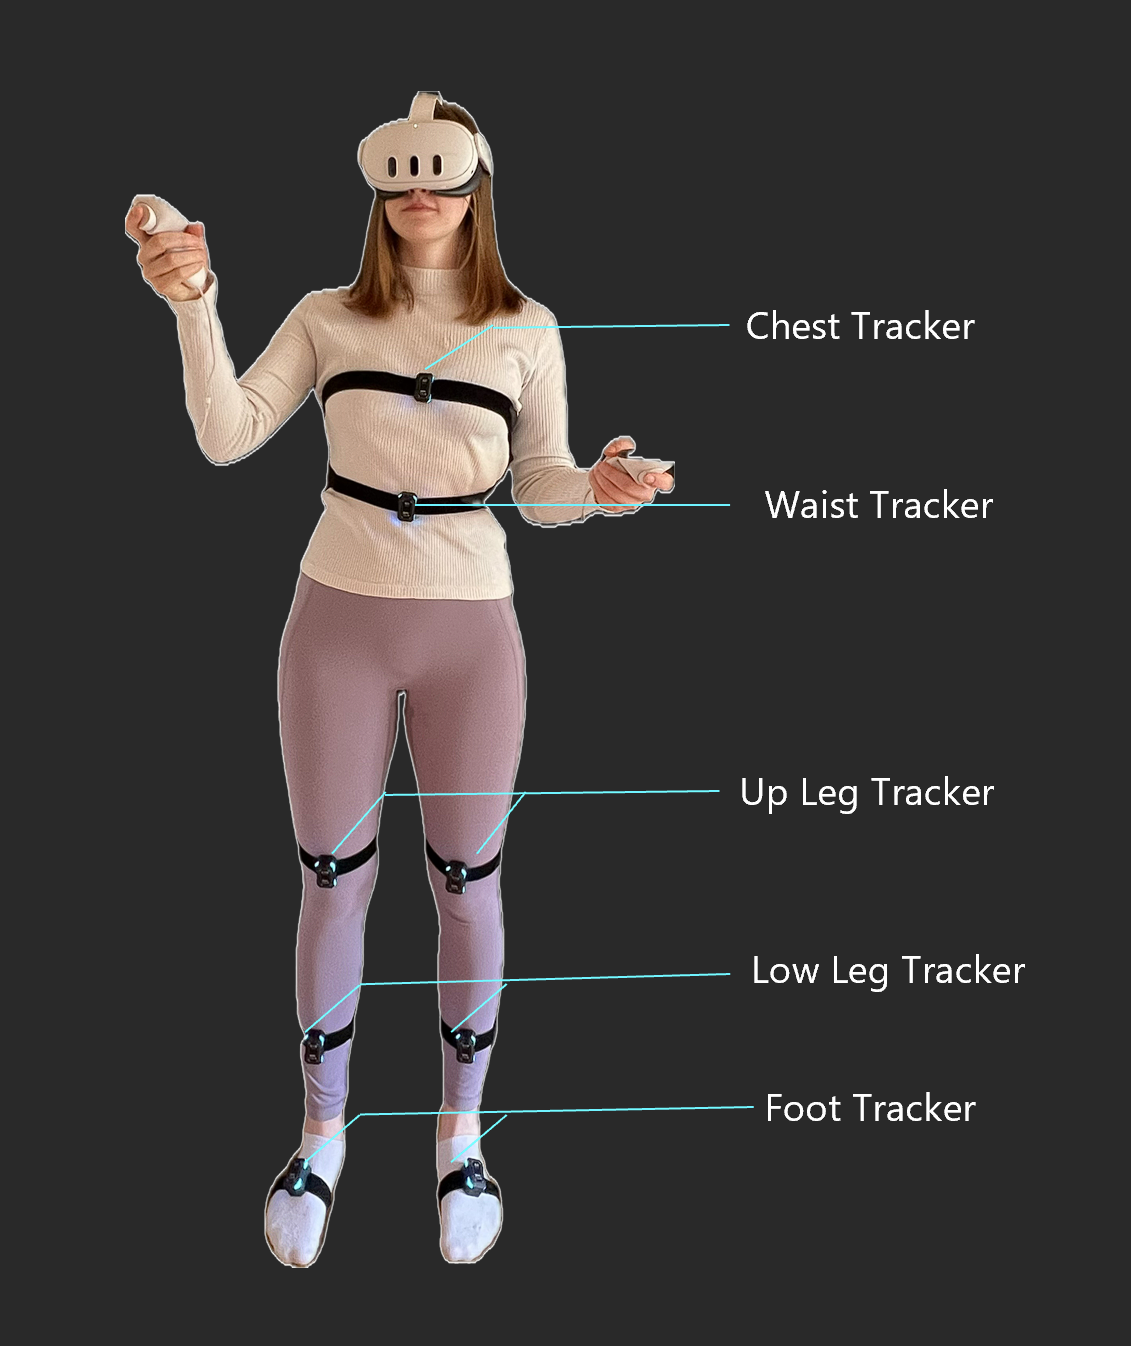
We recommend starting with the 6-point setup. If you are using foot trackers, mount them about one-quarter of the way down the inside of each foot.
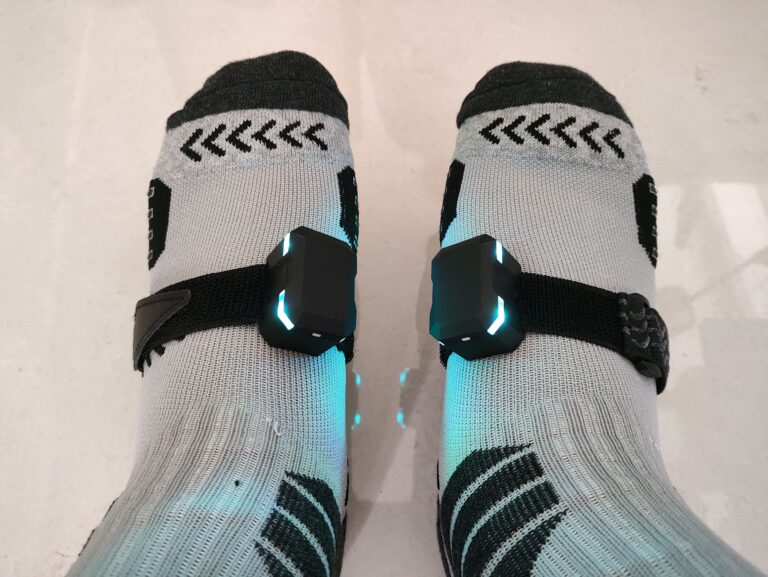
> 💡 **Tip:** Tighten the straps so the trackers stay in place, but not so tight that they become uncomfortable during long sessions.
## Label Your Trackers
For quick identification and correct placement, EXCAP provides sticker labels for each tracker position. Each tracker is assigned a default body position the first time it starts up.
Click a device card in Excap Studio to see which position it is paired to, then attach the matching sticker to that tracker’s casing.
> 💡 **Tip:** Labeling your trackers now will save you time every time you put them on later.
---
> **Next:** [Download and Install](/books/quick-start/page/download-and-install) ➡️
# Download and Install
Great — your trackers are out of the box and ready to wear. Now let's get Excap Studio installed, the drivers ready, and your trackers powered on. Follow the five steps below and you'll be up and running in just a few minutes. 🚀
## Step 1: Download Excap Studio
1. Go to the [Downloads – Elecholic](https://www.elecholic.tech/resource/downloads/) page.
2. Download and run `Excap Studio.exe` to install the software.
## Step 2: Install the CH340 Driver
On the same [Downloads](https://www.elecholic.tech/resource/downloads/) page, download and install `CH340.exe`. Even if you already have a CH340 driver installed, please install this specific version to avoid compatibility problems caused by older driver versions.
> ⚠️ **Warning:** The driver is required for the USB dongle to communicate with your PC. If the dongle is not detected, the trackers will not appear in Excap Studio.
## Step 3: Launch Excap Studio for the First Time
Double-click the Excap Studio shortcut to launch the application.
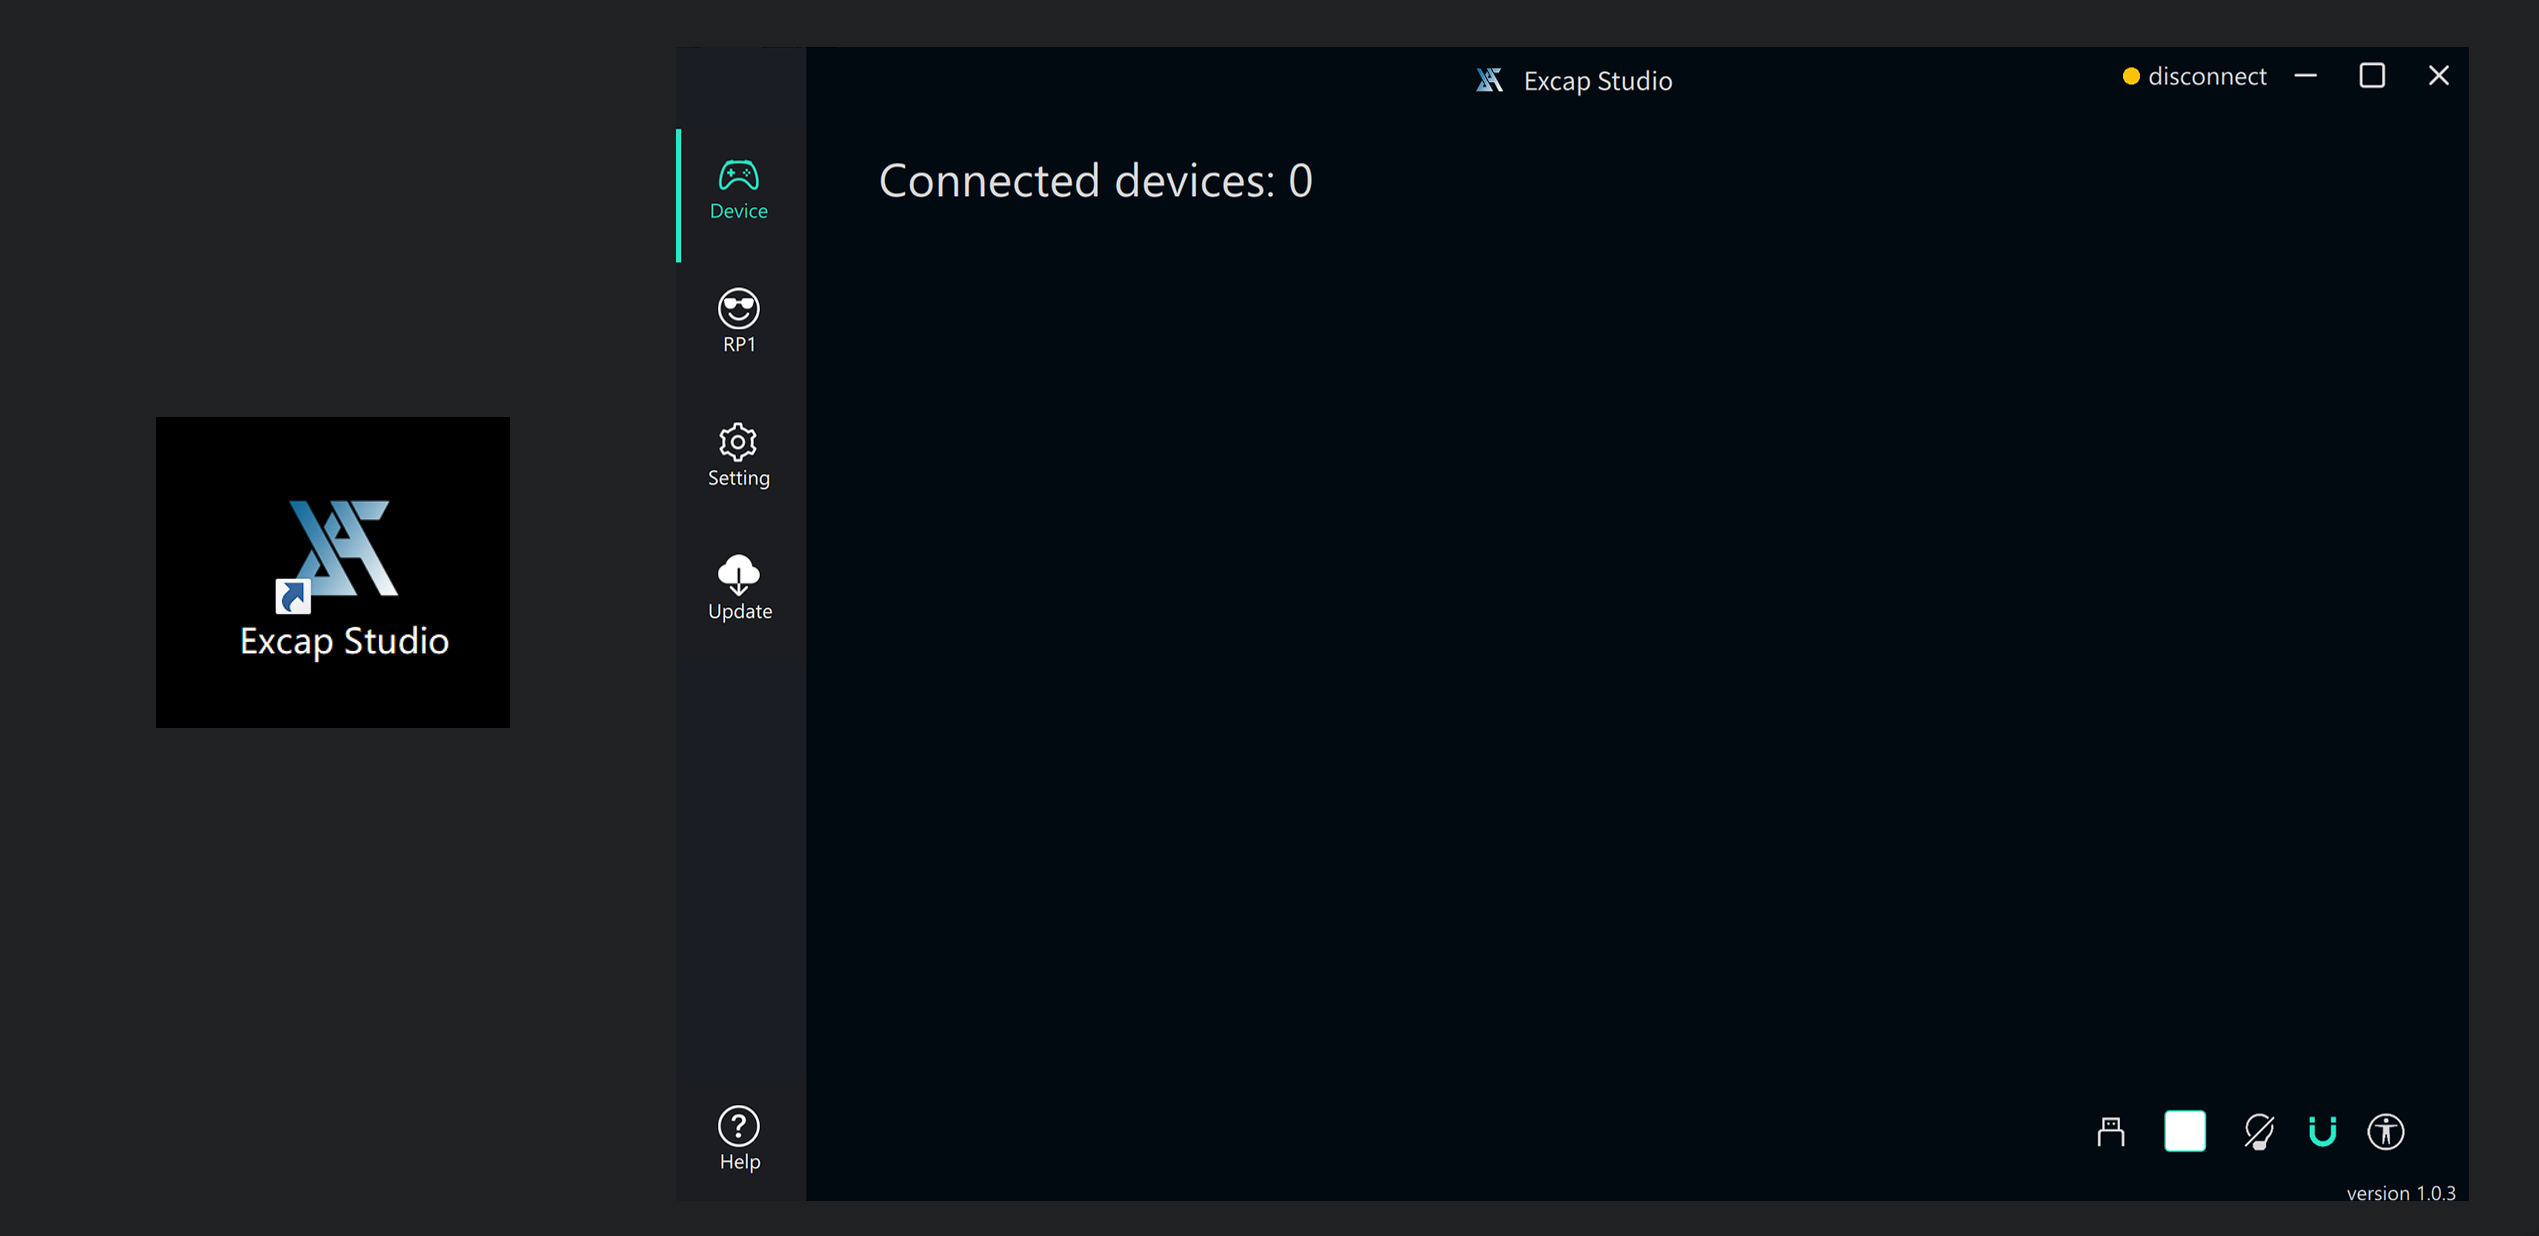
Excap Studio will automatically check whether the SteamVR driver and the Excap Link USB dongle driver are installed. If either is missing, the software will install it for you.
## Step 4: Connect the USB Dongle
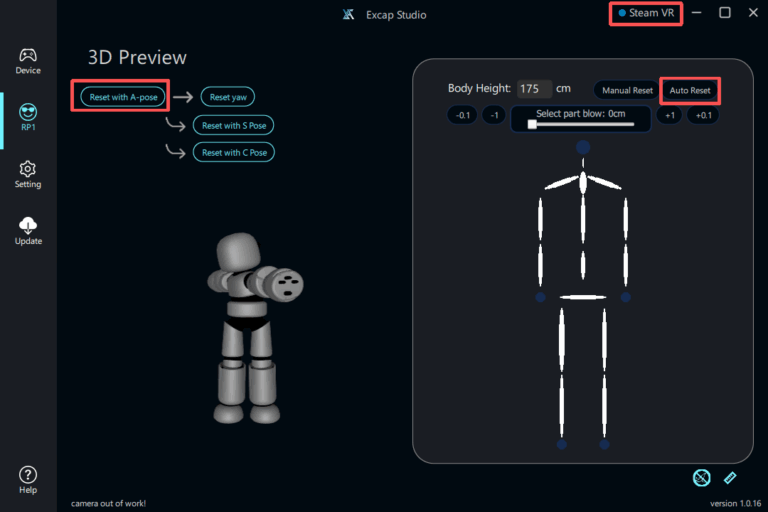
Plug the included USB dongle into your PC and check the device connection information in Excap Studio. If the dongle does not appear, go back to Step 2 and reinstall the CH340 driver.

> 💡 **Tip:** You can turn off every tracker at once by simply unplugging the USB dongle from the PC.
## Step 5: Power On Your Trackers
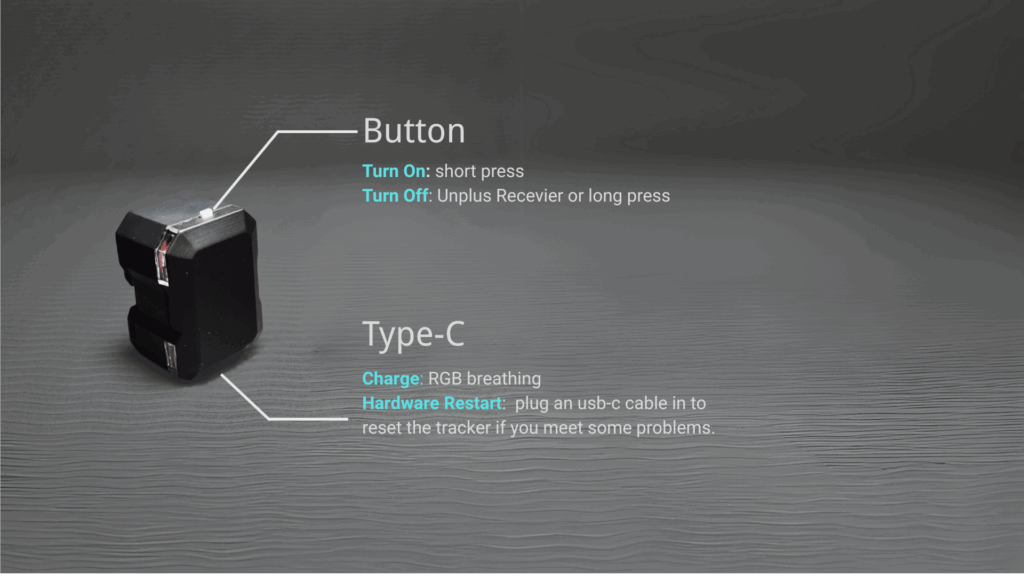
1. Press the button on each of the 8 EXCAP trackers. If the RGB lights turn on, the tracker is powered on successfully.
2. Wait until all 8 trackers are listed in the Excap Studio interface.
3. Shake or tap a tracker and confirm that its entry in the device list highlights in response.
## Basic Operation
| Action | How to do it |
|:---|:---|
| **Turn on** | Short press the button |
| **Turn off** | Press and hold the button for 1 second, then release, or unplug the USB dongle |
| **Charging** | RGB light breathes |
| **Fully charged** | RGB light turns off |
> ⚠️ **Warning:** Pressing and holding a tracker button for 5 seconds puts it into pairing mode. Be careful to avoid accidental long presses.
---
> ⬅️ **Previous:** [Unboxing](/books/quick-start/page/unboxing) · **Next:** [Enter Game and Calibration](/books/quick-start/page/enter-game-and-calibration) ➡️
# Enter Game and Calibration
Your trackers are connected and Excap Studio is running. Now for the fun part — let's jump into VR and calibrate your body so every movement feels natural. 🎯
## Choose Your Connection Mode
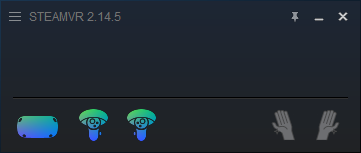
Select the mode that matches your headset in the top-right corner of Excap Studio.
- **SteamVR** — for PCVR headsets such as Index, Vive, or Pimax.
- **Standalone** — for Quest, Pico, or other standalone headsets running VRChat.
Make sure your headset has already connected to SteamVR or VRChat before you continue.
> 📝 **Note:** Haven't installed Steam, SteamVR, or VRChat yet? Follow [Connect with SteamVR](/books/connect-excap-to-game/page/connect-with-steamvr) or [Connect with Standalone](/books/connect-excap-to-game/page/connect-with-standalone) first, then come back here.
## Reset Your Body Proportions
Click **Auto Reset**. Excap Studio will estimate your height from the headset position and calculate your body proportions. You can also type your actual height and then click **Manual Reset**.
## Calibrate with A-Pose
Because wearing positions vary from person to person, you should calibrate the trackers before each use.
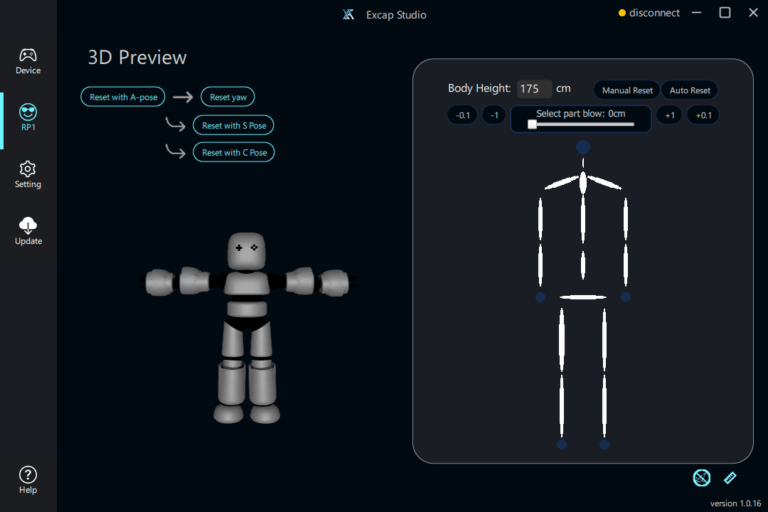
**A-Pose:** Face forward, stand up straight, and keep your feet about a fist’s width apart.
You can trigger the A-Pose reset in two ways:
1. Short-press the button on the **Chest** tracker (less than 1 second, or the tracker may turn off).
2. Click the **Reset with A-Pose** button in Excap Studio.
## Calibrate Inside VRChat
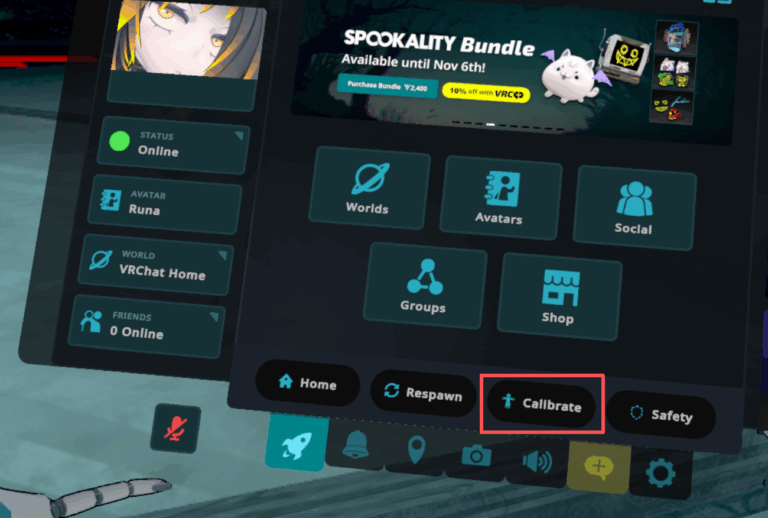
1. Press the **Y button** on the left controller and select **Calibrate** from the menu.
2. Pull both controller triggers at the same time.
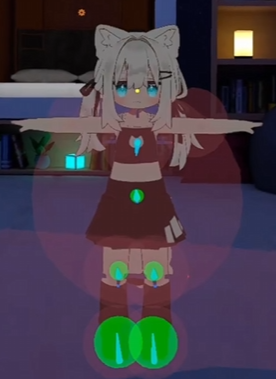
3. Enjoy full-body tracking in VRChat! 🎉
---
> ⬅️ **Previous:** [Download and Install](/books/quick-start/page/download-and-install) · **Next:** [Congratulations and What's Next](/books/quick-start/page/congratulations-and-whats-next) ➡️
# Congratulations and What's Next
You did it! 🎉 Your EXCAP trackers are set up, calibrated, and ready to move with you in VR. This page has a few final tips to keep your sessions smooth and pointers on where to go next.
## You're All Set!
You have completed all the startup steps. Put on your headset, hop into VRChat, and enjoy full-body tracking with EXCAP.
## Quick Tips for the Best Experience
> 💡 **Tip:** Turn on the trackers and place them on a flat, stable surface for about one minute before wearing them. This reduces IMU drift. Try to avoid vibration during calibration.
> 📝 **Note:** If you plan to use magnetometer mode, calibrate the magnetometer in each tracker first. See the [Three Modes in EXCAP](/books/excap-settings/page/three-modes-in-excap) chapter for details.
## Where to Go Next
- 🎮 **Connect to your favorite game:**
- [Connect with SteamVR](/books/connect-excap-to-game/page/connect-with-steamvr)
- [Connect with SlimeVR](/books/connect-excap-to-game/page/connect-with-slimevr)
- [Connect with Standalone](/books/connect-excap-to-game/page/connect-with-standalone)
- ⚙️ **Fine-tune your setup:** [EXCAP Settings](/books/excap-settings)
- ❓ **Questions or issues?** Check the [Q&A](/books/troubleshooting-faq/page/qa)
---
> ⬅️ **Previous:** [Enter Game and Calibration](/books/quick-start/page/enter-game-and-calibration) · **Stuck?** [Q&A](/books/troubleshooting-faq/page/qa) ❓